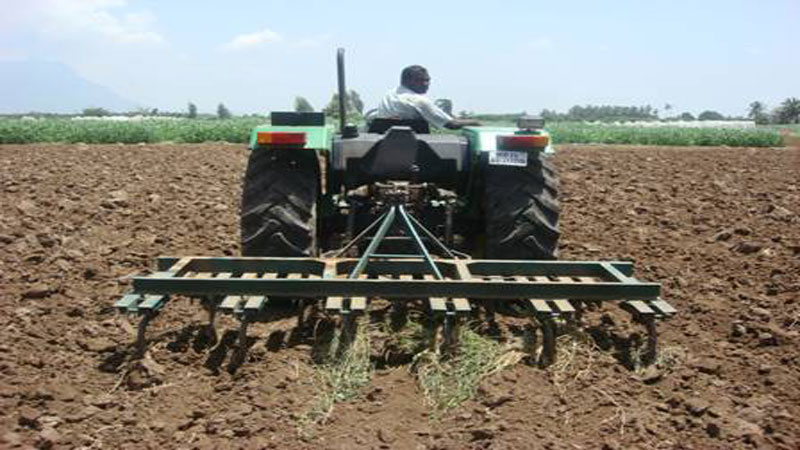
Field Preparation

- Ragi is cultivated on a variety of soils ranging from rich loam to poor shallow upland soils.
- It prefers porous and well drained loam to light red loam and sandy loam soils of good fertility but reasonable water holding capacity.
- It can tolerate some water logging. Black soils with sufficient drainage capacity also support to cultivate Ragi crop.
- In southern India, it predominates on marginal soil conditions, provided by lateritic and red sandy loams.
- It withstands and thrives well on slightly alkaline soils too. It seems to have ability to utilize rock phosphate than other cereals do.
- The soil should be rich in organic matter. Deep vertisols and rocky soils are not suitable for this crop owing to poor drainage and low fertility.
- It can be grown in soils with pH of 4.5-7.5.
- Tank silt is applied to the soil just before the rain begins and soon after the land is ploughed thrice to incorporate weeds in the soil.
- Heavy clay soils with poor drainage is less suitable
Land Preparation The land is prepared separately for irrigated and rainfed conditions. In areas with a rainfall of 60 to 75 cm, ragi is cultivated as a rainfed crop. So the field should be deeply ploughed for moisture conservation. But in irrigated crop, plough the field immediately at the arrival of monsoon until gets fine tilth.
| Irrigated | Rainfed |
|---|---|
|
|

|
 |
A plant population of 4 to 5 lakhs per ha is optimum for getting higher yields and higher or lower population than the optimum will reduce the yield. There are Various methods practiced for ragi cultivation .
- In rainfed ragi , ragi is grown as intercrop or mixed crop with non cereal crops.
- In irrigated ragi , ragi is grown as sole crop.
The following methods are used for irrigated and rainfed ragi.
Direct Sowing
i. Broadcasting
|
 |
ii. Line Sowing
|
 |
iii. Drilling in rows
|
 |
Transplanting
Transplanting is the practice of raising the seedlings in nursery and transplant.
a. Transplanting the seedlings- Irrigate the beds during transplanting and level the bed if it is not levelled
- 3 to 4 weeks seedlings should be transplanted in the field
- Transplant 2 to 3 seedlings per hill in normal planting and 4 to 6 seedlings in delayed planting.
- For early kharif and Rabi season, plant 21 – 25 days old seedlings at a spacing of 25 cm x 10 cm
- For Late Kharif season, plant 25-28 days old seedlings at a spacing of 30 x 10 cm
- Plant the seedlings at a depth of 2 to 3 cm. Deeper planting delays tillering and root regeneration, increases duration and flowering at different times
- Transplant in lines at proper spacing to maintain the correct level of panicles per metre. This also eases subsequent operations. Random planting leads to uneven growth of tillers and reduce panicles per metre.
- Prepare slurry with 5 packets (1000g) per hectare of Azospirillum inoculant in 40 litres of water and dip the root portion of the seedlings in the solution for 15 to 30 minutes and transplant.
- Dip the leafy portion of the seedlings in 0.1% carbendazim solution before planting to arrest the transfer of blast to main field.
- The beds should be irrigated on the third day after transplantation
- Replace the dead hills with new seedlings from the same nursery within one week
- When planting ragi seedlings beyond 21 days, increase the number of seedlings to 3/hill and increase N level by 25% to minimize yield loss.
- Maintenance of optimum plant population is an important prerequisite for getting higher yield under rainfed conditions. Poor germination, often, is the result of inadequate moisture after sowing in low rainfall areas. Under these conditions, the adoption of a simple technique like seed hardening will not only improve germination and subsequent plant stand but also impact early seedling vigour and tolerance to drought.
Step 1: Soak seeds in water for 6 hours. Use one litre of water for every kg seed for soaking.
Step 2: Drain the water and keep the seeds in wet cloth bag tightly tied for two days.
Step 3: At this stage, the seeds will show initial signs of germination.
Step 4: Remove seeds from the wet cloth bag and dry them in shade on a dry cloth for 2 days.
Step 5: Use the above hardened seeds for sowing.